It is now (has been for a while) possible to modify Azure AD via the Azure Automation. The example below uses the Run As Automation Account to first Connect to Azure AD and then run the appropriate commands. You can also create a dedicated Run As account if you want, as well as use a username and password (less secure).
Before you write your code make sure that you:
- Add the “AzureAD” module to the Automation Account
- Give the Azure Automation Run As account the appropriate permission as show at the end of this article
Automation Code example (list all the groups in AD):
|
1
2
3
4
5
6
7
8
9
10
11
12
13
14
15
16
17
18
19
20
21
22
23
24
25
|
$ErrorActionPreference = "Stop"
$connectionName = "AzureRunAsConnection"
try
{
# Get the connection "AzureRunAsConnection "
$servicePrincipalConnection=Get-AutomationConnection -Name $connectionName
"Logging in to Azure Active Directory"
Connect-AzureAD `
-TenantId $servicePrincipalConnection.TenantId `
-ApplicationId $servicePrincipalConnection.ApplicationId `
-CertificateThumbprint $servicePrincipalConnection.CertificateThumbprint
}
catch {
if (!$servicePrincipalConnection)
{
$ErrorMessage = "Connection $connectionName not found."
throw $ErrorMessage
} else{
Write-Error -Message $_.Exception
throw $_.Exception
}
}
Get-AzureADGroup
|
Give the Azure Automation Run As account the appropriate permissions:
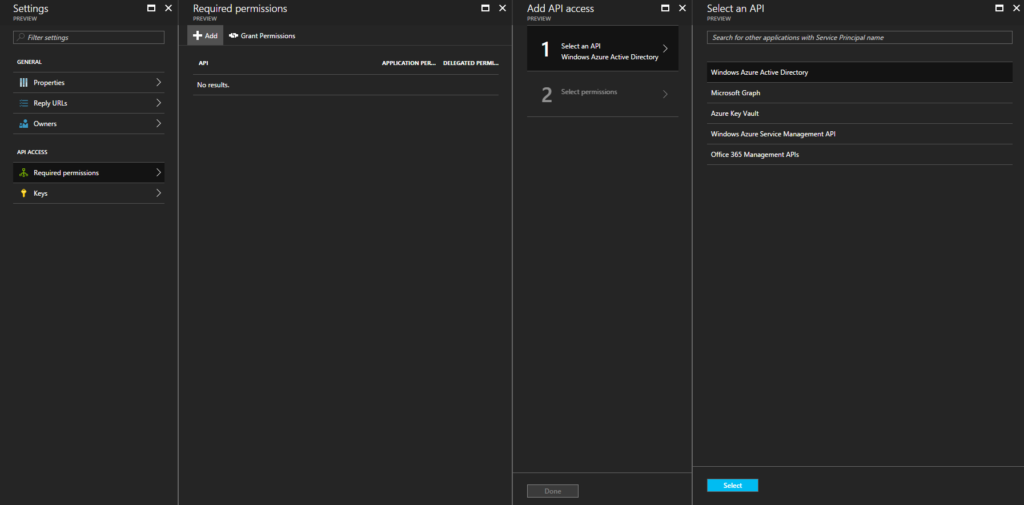
- Go to Azure Active Directory -> App registrations -> The Run Ass Account.
- Then go to the API access as show:
- Give the appropriate access, example below:
Don’t forget to click grant permissions!


