Renew Deleted Expired Certificate For Windows Service Bus

Windows

Renewing a expired certificate for a windows service bus is quite simple and the process is documented on msdn.

1. Stop-SBFarm on one of the nodes in the farm.
2. Install a new certificate on all Service Bus machines.
3. Set-SBCertificate – FarmCertificateThumbprint: Thumbprint of the new farm certificate – SkipKeyReEncryption
4. Update-SBHost cmdlet on all farm nodes.
5. Set-SBNamespace – Name namespace – PrimarySymmetricKey: service namespace key.
6.Call the Start-SBFarm cmdlet on one of the farm nodes.

However if the expired certificate has been deleted, you will run into issues running any command against the servicebus.

You will most likely receive the following error:

Certificate requested with thumbprint not found in the certificate store

certerror

I have seen various methods to resolve this by editing the registry and removing entries from SQL or re implementing your service bus, but a cleaner method is to simply restore your expired cert so it can be renewed.

1. Logon to your certificate authority
2. Find the issued certificate request by using the filter by using the certificate hash field and enter the thumbprint for the expired certificate. (note: thumbprint format uses spaces)
3. Select the certificate and export as binary and save as using the .cer file extension
4. Copy the .cer file to your service bus server
5. Import the certificate to the local store
6. Open the certificate store, and view the properties of the imported certificate. select the details tab and note down the serial number
7. Open command prompt as administrator and run the following: certutil -repairstore my “serialnumber”
8. Open powershell as administrator and run the following: get-sbfarm
9. Run the following start-sbfarm
10. You now can follow the procedure to renew a expired certificate

ADFS Claim Rules for Groups and Cross Forest

Windows

Here are some quick ADFS claim rules to get some specific requests. Remember to create the rules in order:

Case 1

Get the users group membership, including groups of groups and filter on for any group beginning with “Group-XX” then send as a role claim:

Rule 1

Rule 2


Case 2 (Update 13/09/2016 – Apologizes as i had uploaded the wrong rules initially, they are now correct)

Get the users Cross Forest Sec Group Membership (from TESTDOMAIN domain) Claim including groups of groups and filter on for any group beginning with “Group-XX” then send as a role claim.Before you set these rules remember to give the ADFS service account access to read foreign group membership of the domain you are quering as detailed here: https://social.technet.microsoft.com/Forums/windowsserver/en-US/bda33eb9-ff6e-4e79-967d-f5430ade7310/give-access-to-account-to-view-member-of-attribute-on-foreign-security-principal?forum=winserverDS

  • Replace TESTDOMAIN with the domain you are trying to query
  • Replace Group-XX with the beginning of the group/s you are looking for, it’s a regex expression and you can also customize it to your needs. Alternatively you can remove “,  Value =~ “(?i)^Group-XX” ” and that will list all groups.

Rule 1

Rule 2:

Rule 3:

Rule 4:

Rule 5:


Turn off ProtectedFromAccidentalDeletion From OU and All sub OUs

Windows

If you ever had the task to delete an OU which had Protected From Accidental Deletion enabled on all sub OU’s it can be a pain to manually unchecked for every single one.The easy fix is to run a command to turn off the feature for you on all sub OU’s. To do this we run the following powershell command, just replace the path to your OU and the server, leave the rest as it is:


Configure GitLab SAML with ADFS 3.0

Windows

While setting up gitlab with ADFS 3.0 we noticed there is a couple of gotchas you need to watch out for:

  1. You need to set the NotBeforeSkew to something like 2 in ADFS
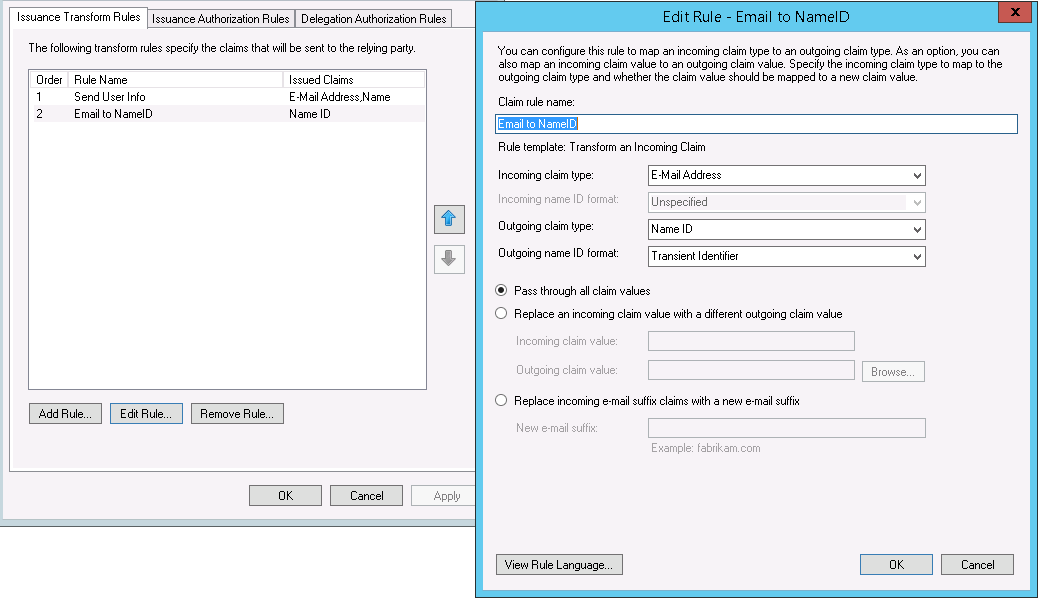
  2. You need to trasform the transient identifier in ADFS
  3. idp_cert_fingerprint is case sensitive and needs to be all in CAPS

To set it up follow the following instructions:

In gitlab you need to set the following config

  • Replace the https://gitlab.com with your gitlab address
  • Replace the https://adfs.com with your ADFS address
  • REplace the https://gitlab.local with what ever you like
  • Replace 35:FA:DD:CF:1E:8F:8B:E4:CA:E1:AE:2A:EF:70:95:D5:DC:5C:67:1B with the finger print of your signing certificate


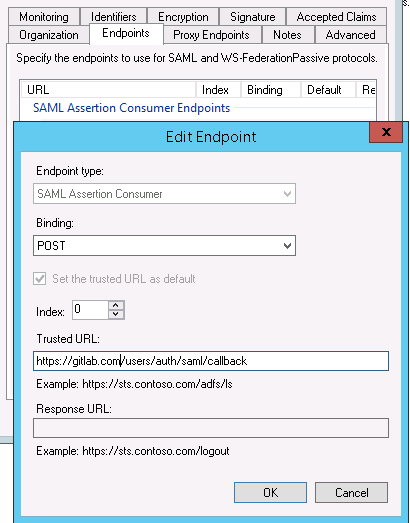
For ADFS configure the following settings (Use the same address replacements as above):

gitlab1

gitlab2

gitlab3

gitlab4gitlab5 gitlab6

Then Run the following command to set the skew in Powershell on the ADFS server:


Enable ADFS OAUTH2 for Mattermost 3.0

Mattermost

Since Mattermost released a new version with a lot of bug fixes, features and security enchantments i decided to release a second version for Mattermost with ADFS integration. This is a modified version of the May 17, 2016 stable Mattermost release v3.0.2


The advantages of using ADFS over other methods:

  • True SSO
  • Much more secure then LDAP or gitlab with LDAP
  • Proven for Enterprise

We have also made sure that the following features are available:

  • Other domains and forest can also use Mattermost if invited and a trusts exists
  • Authentication is based on AD SID so if a user is deleted or leaves the company a new user with the same domain username will get a new account with a different username. This is very important as it insures that users are unique and that even if you have two users with the same usernames in different domains they will each get there unique username and not effect one another.
  • Please note that emails do need to be unique, if a user tries to register with an email which is already in the system they will get an error informing them that a user already exists.
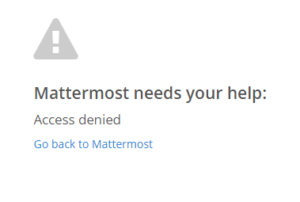
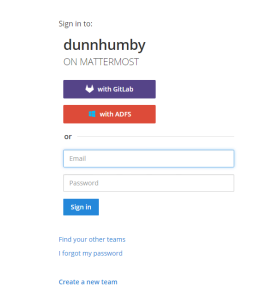
  • Visual error message if user is denied access from ADFS (Added on 21/06/2016)

Here is the guide on where to get it and how to configure it:

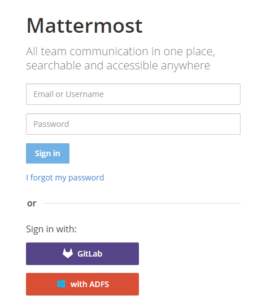
adfsm10adfsm9  adfsm3 adfsm4ADFS_Error_Mattermost

You will first need to download/compile and install the new version which can be found below:

You can download the compiled version from form https://github.com/lubenk/platform/releases or here:

Linux: https://gi-architects.co.uk/wp-content/uploads/2016/05/mattermost-team-linux-amd64.tar.gz
OSX: https://gi-architects.co.uk/wp-content/uploads/2016/05/mattermost-team-osx-amd64.tar.gz
Windows: https://gi-architects.co.uk/wp-content/uploads/2016/05/mattermost-team-windows-amd64.tar.gz

You can get the code from: https://github.com/lubenk/platform/tree/ADFS-3.0.2


Now that you have a working copy it’s time to configure ADFS 3.0 for OAUTH2.0 please use the instructions on : https://gi-architects.co.uk/2016/04/setup-oauth2-on-adfs-3-0/

with the following additions notes:

ClientID : Just generate one at https://www.guidgenerator.com/online-guid-generator.aspx (please make sure this guid is either more then or less then 26 characters).
Redirect URI : https://mattermost.local/signup/adfs/complete (where mattermost.local is the dns address of your mattermost app)
Relaying party identifier: you can just use your dns address of your mattermost app

The following Claim setup, please make sure the claims are exact, the rules name can be anything:

adfsm7

adfsm5

adfsm8

adfsm6


Once you setup adfs you need to configure mattermost, you can either do this via the config.json or via the admin interface as show below:

adfsm4

Please make sure you copy the public key of the ADFS root CA of your Service Communications Certificate in PEM format (the format that has —-BEGIN CERTIFICATE—- in it) into /usr/local/share/ca-certificates and name it with a .crt file extension, then run “sudo update-ca-certificates”.

You also need the public key of the signing certificate in PEM format somewhere on the server which you will need to reference in the settings.

And that is it you should have a working version with ADFS


Additional Update (21/06/2016)

I have coded in an error checking method if you deny access from the ADFS side so now it will display a nice message as show above.

If you want to configure ADFS to deny access for users based on group or email or other variables you can easily do by:

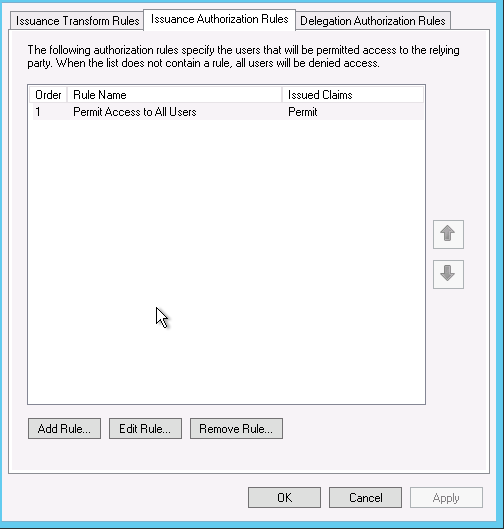
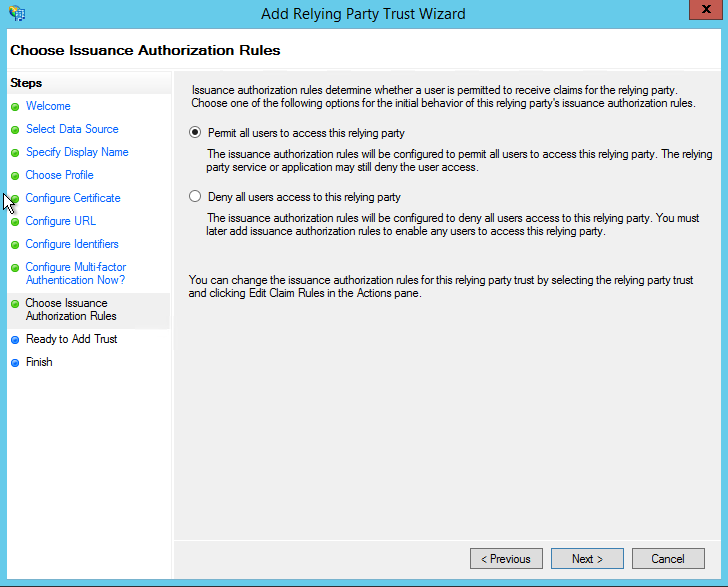
Go into you Mattermost reply party and edit the claims, once in go to Issuance Authorization Rules and delete the default one which permits access for everyone.

adfs_issuance_authorization1

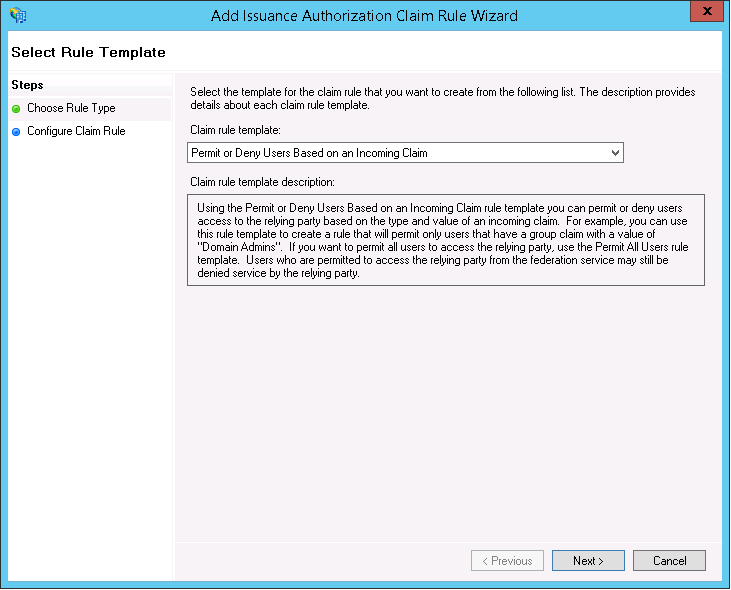
Once deleted add a new Rule based on “Permit or Deny Users Based on an Incoming Claim”

adfs_issuance_authorization2

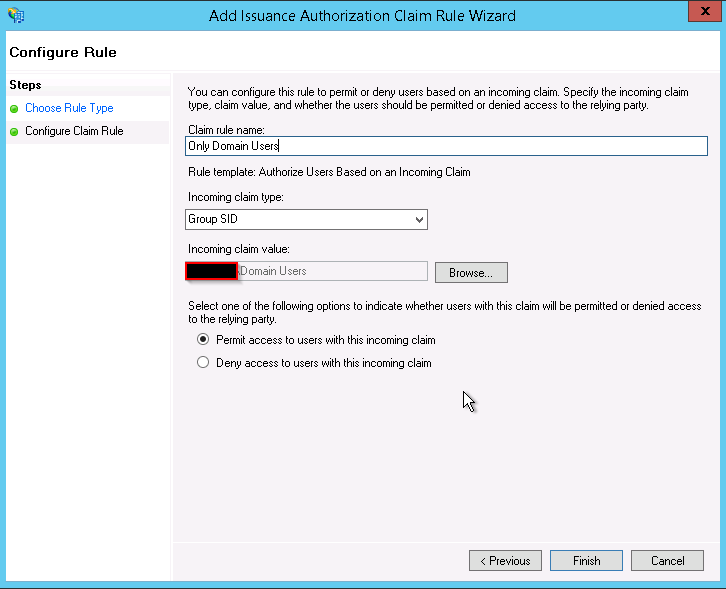
And chose the type of filtering for example i chose based on group membership and then allow.

adfs_issuance_authorization3

You can create multiple rules as well as create deny rule, just make sure you order them correctly.

Setup OAUTH2 on ADFS 3.0

Windows

In this article i will go over how to setup your ADFS 3.0 (available in Windows Server 2012 R2) server for OAUTH2 authentication.

A couple of things to note:

  • This setup will work for both standalone and farm deployments (including using the WID database). This is because Microsoft build an OAuth Authorization Code Lookup Protocol so that if one server generates the token you can claim it from another in the farm (when using standalone artifact store): https://msdn.microsoft.com/en-us/library/dn409270.aspx
  • Make sure you have a basic ADFS configured, there are plenty of guides like this one: https://technet.microsoft.com/en-GB/library/dn486820.aspx
  • ADFS 3.0 does not support secrets or token encryption/decryption for OAUTH2
  • While OAUTH2 is a standardized protocol i would not call Microsoft implementation a straight forward or standardized solution as there are some specifications.
  • If you are using a self-singed certificate please make sure that:
  • Make sure when you open the certificates in the AD FS console there are no errors
  • I have used SHA 256 RSA Certificates and they work great.

!!!Warning!!! – If you use 512 Certificates you will experience issues on ADFS and with OAUTH2.0. You will need to disable TLS1.2 as it doesn’t support 512. You may see errors as show below in the AD FS Admin error log:

Event ID: 36874– TLS 1.2 connection request was received from a remote client application, but none of the cipher suites supported by the client application are supported by the server. The SSL connection request has failed.

Here is some information you will need before we begin:

  • ClientID : you can either come up with this or just use a generator like : https://www.guidgenerator.com/online-guid-generator.aspx
  • Redirect URI : depending on the application you use and the domain this value will very so please check the application documentation (basically where the browser needs to be redirect after the authentication completes)
  • Relaying party identifier: in most cases you will make this up, i recommend using the application domain eg.(https://www.myapp.com)
  • The Claims: This would be what values you require to return back to the application, check with the application documentation.

After you are done you will need to make a note of the following things in order to configure your application:

  • ClientID
  • Redirect URI
  • Auth Endpoint : this would be https://myadfs.com/adfs/oauth2/authorize (replace myadfs with whatever domain you have configured)
  • Token Endpoint : this would be https://myadfs.com/adfs/oauth2/token (replace myadfs with whatever domain you have configured)
  • The public key (the cert without the private key) of the root CA of your Service Communications Certificate. You can export this and add it to your application server Trusted Root Certification Authorities. This is need for a successful TLS communication.
  • The public key (the cert without the private key) of your signing certificate. Usually you will need this in PEM or CRT format so you may need to convert it. This will be needed if you or the application you are using needs to verify the JWT token signature (strongly recommended).

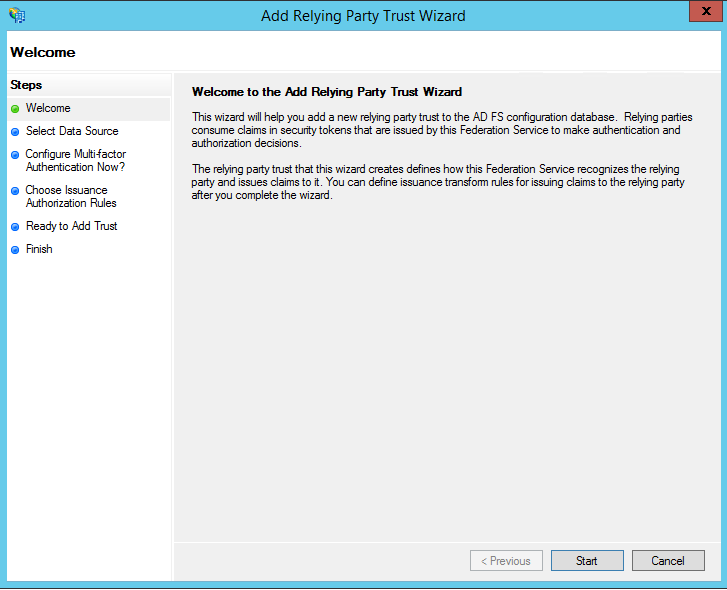
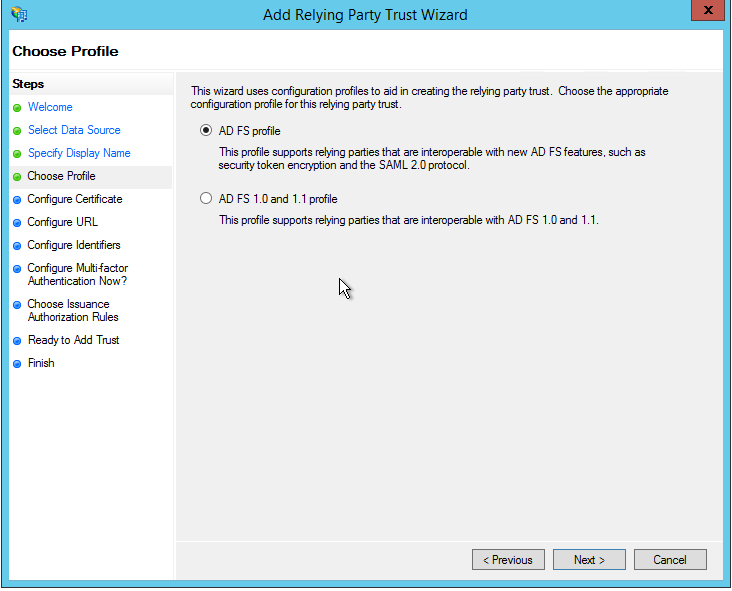
Lets go into our ADFS server console and first configure our Relying Party Trust:

adfs1

adfs2

adfs3

Now give our Relying Party Trust a meaningful name

adfs4

adfs5

Leave the next section blank as ADFS3 OAuth2 does not support encryption

adfs6

Again we leave it blank as we don’t use SAML or WS

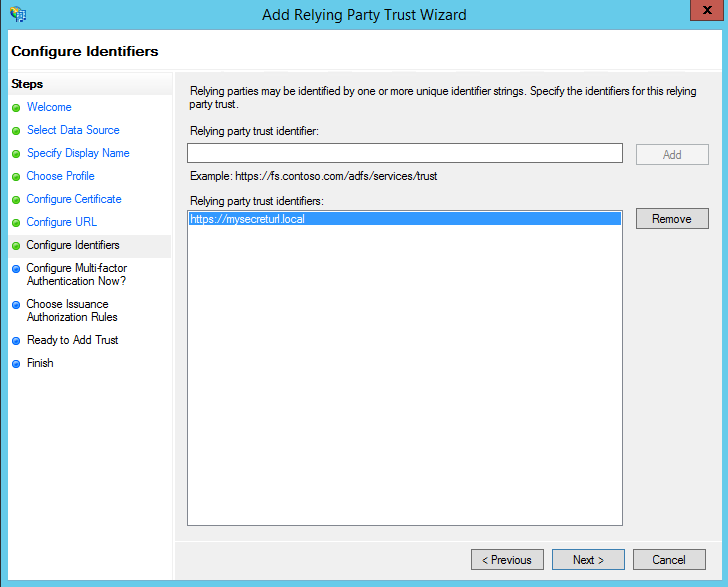
adfs7

now we need to enter our Relaying party identifier

adfs8

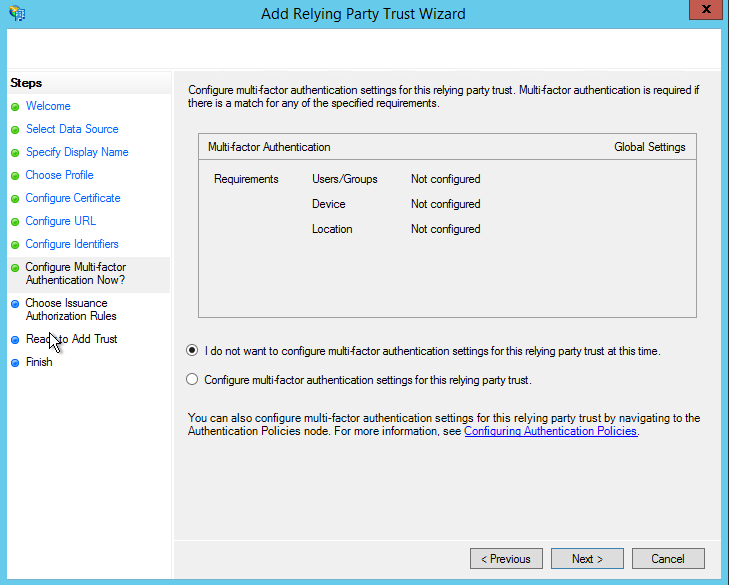
If you need multi factor then configure it if not skip it

adfs9

adfs10


Once that is done you can configure your Claims (Issuance Transform Rules) whatever they may be


Once done we need to configure our endpoints and we do this via Powershell with the following command:

We specify some of the variables you collected before hand and then give it a meaningful name


I also recommend you set the option “EnableJWT” to true on the Relying Party Trust you configured by running:


And that should be it, you should be able to now use the OAUTH2 function with your app.

Enable ADFS OAUTH2 for Mattermost 2.1

Mattermost


 Please note, we have released a new version for Mattermost 3.0.2

Enable ADFS OAUTH2 for Mattermost 3.0

So we had a request a few weeks ago to get Mattermost 2.1 working with ADFS so we can use SSO. Unfortunately for us no one had coded a version that can work with ADFS, so we took on the challenge. After two weeks and lots of trials and errors we had designed a secure version ( Mattermost 2.1.1) that worked with ADFS. This version is based on the the March 16, 2016 stable release v2.1.0 of Mattermost.

The advantages of using ADFS over other methods:

  • True SSO
  • Much more secure then LDAP or gitlab with LDAP
  • Proven for Enterprise

We have also made sure that the following features are available:

  • Other domains and forest can also use Mattermost if invited and trusts exists
  • Authentication is based on AD SID so if a user is deleted or leaves the company a new user with the same domain username will get a new account with a different username. This is very important as it insures that users are unique and that even if you have two users with the same usernames in different domains they will each get there unique username and not effect one another.

Here is the guide on where to get it and how to configure it:

adfsm1 adfsm2 adfsm3 adfsm4

You will first need to download/compile and install the new version which can be found below:

You can download the compiled version from: https://gi-architects.co.uk/wp-content/uploads/2016/04/mattermost.tar.gz or form https://github.com/lubenk/platform/releases

You can get the code from: https://github.com/lubenk/platform/tree/ADFS-2.1.1


Now that you have a working copy it’s time to configure ADFS 3.0 for OAUTH2.0 please use the instructions on : https://gi-architects.co.uk/2016/04/setup-oauth2-on-adfs-3-0/

with the following additions notes:

ClientID : Just generate one at https://www.guidgenerator.com/online-guid-generator.aspx (please make sure this guid is either more then or less then 26 characters).
Redirect URI : https://mattermost.local/signup/adfs/complete (where mattermost.local is the dns address of your mattermost app)
Relaying party identifier: you can just use your dns address of your mattermost app

The following Claim setup, please make sure the claims are exact, the rules name can be anything:

adfsm7

adfsm5

adfsm8

adfsm6


Once you setup adfs you need to configure mattermost, you can either do this via the config.json or via the admin interface as show below:

adfsm4

Please make sure you copy the public key of the ADFS root CA of your Service Communications Certificate in PEM format (the format that has —-BEGIN CERTIFICATE—- in it) into /usr/local/share/ca-certificates and name it with a .crt file extension, then run “sudo update-ca-certificates”.

You also need the public key of the signing certificate in PEM format somewhere on the server which you will need to reference in the settings.

And that is it you should have a working version with ADFS